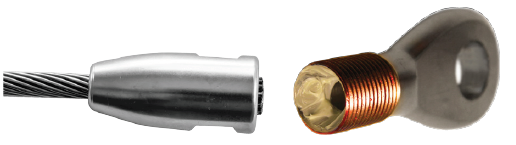
Get the famous NORSEMAN line from Inox System well known to boaters for shroud repairs.
.png)
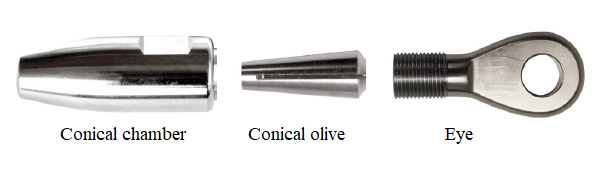
The norseman terminal is designed for single core (1x19) and (1x19) Compact or Dyform construction cables.
Users are responsible for the proper use of these parts and the component installation.
Blue Wave recommends not to seal the terminal with a waterproof product, but recommends regularly rinsing the SCT tips with fresh water and treating with WD40.
Blue Wave declines all liability for damage to threads due to overtightening or lack of lubrication (WD40).
Parts needed:
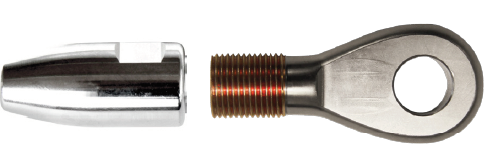
1) Apply Loctite 262 (or equivalent) to the threads, and screw the two parts together. Separate the two parts again to make sure the threads are properly coated with Loctite.
2) Slide the conical chamber onto the cable as shown. Spread the outer strands one by one. A screwdriver is useful for this job.

3) Place the conical olive around the cable's central core. Turningthe cone while pushing it will facilitate the assembly.
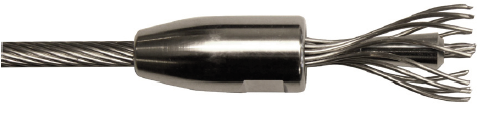
4) Twist the outer strands of the cable back onto the olive. Make sure all strands are evenly distributed around the cone. The end of the cable must extend beyond the olive by 1.5 times the cable diameter. Check this dimension using a ruler or calliper.

5) Coat the surfaces of this part in contact with the cable with Blue Wave lubricant; The SCT terminal is now ready for assembly. Use the appropriate tools to screw the parts together. Once screwed in (up to the point of resistance), lock by an additional half-turn.
Note: The upper part of the tip (the head) should not reveal more than 2 or 3 threads.
6) To check the correct assembly, remove the head again, and make sure the cable strands are correctly distributed around the cone and that they are well positioned in the conical shape of the head, as shown in the photo. The olive must not have slipped (see 4).
Finally, screw the parts back together and let the adhesive dry.
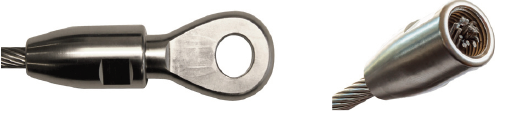
Result:
